I kept staring at the blank ceiling above my bed.
It looked unfinished and the room felt flat.
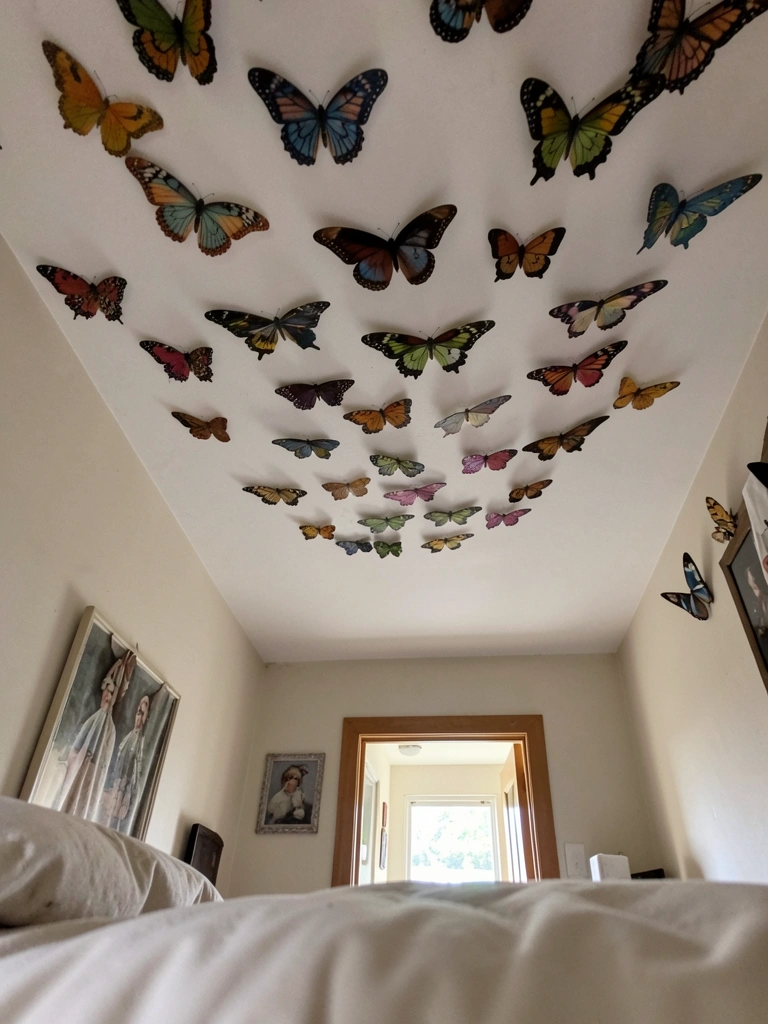
I tried glued-on decals and strings that hung unevenly. I wanted movement without clutter, something intentional and calm.
I needed a simple approach that would read well from bed and doorway. Not busy, just balanced.
How To Design Butterfly Ceiling Room Decor With Ease
I’ll show how to plan and place butterflies so your ceiling reads like part of the room. You’ll end with a calm, layered ceiling that feels balanced from the bed and doorway. This is the method I use every time a room feels unfinished.
What This Solves
It fixes a flat upper plane, adds gentle movement, and ties the ceiling into the room’s color and texture so the whole space feels intentional.
What You’ll Need
- 3D paper butterfly ceiling decals, mixed sizes, matte white — https://www.amazon.com/s?k=3d+paper+butterfly+ceiling+decals&tag={{flowpinsystem-20}}
- Pastel linen fabric butterfly garland, 6 ft — https://www.amazon.com/s?k=pastel+linen+butterfly+garland+6+ft&tag={{flowpinsystem-20}}
- Warm white battery LED fairy lights, 33 ft — https://www.amazon.com/s?k=warm+white+battery+led+fairy+lights+33+ft&tag={{flowpinsystem-20}}
- Clear adhesive ceiling hooks, small pack of 10 — https://www.amazon.com/s?k=clear+adhesive+ceiling+hooks+small+pack+10&tag={{flowpinsystem-20}}
- Sheer white 84-inch curtain panels, set of 2 — https://www.amazon.com/s?k=sheer+white+84+inch+curtain+panels+set+2&tag={{flowpinsystem-20}}
- Neutral 18×18 linen throw pillows, set of 2 — https://www.amazon.com/s?k=neutral+18×18+linen+throw+pillows+set+2&tag={{flowpinsystem-20}}
- Rattan pendant light, natural finish — https://www.amazon.com/s?k=rattan+pendant+light+natural+finish&tag={{flowpinsystem-20}}
- Hanging ceramic planter with macrame, white — https://www.amazon.com/s?k=hanging+ceramic+planter+macrame+white&tag={{flowpinsystem-20}}
Step 1: Pick the right focal area on the ceiling
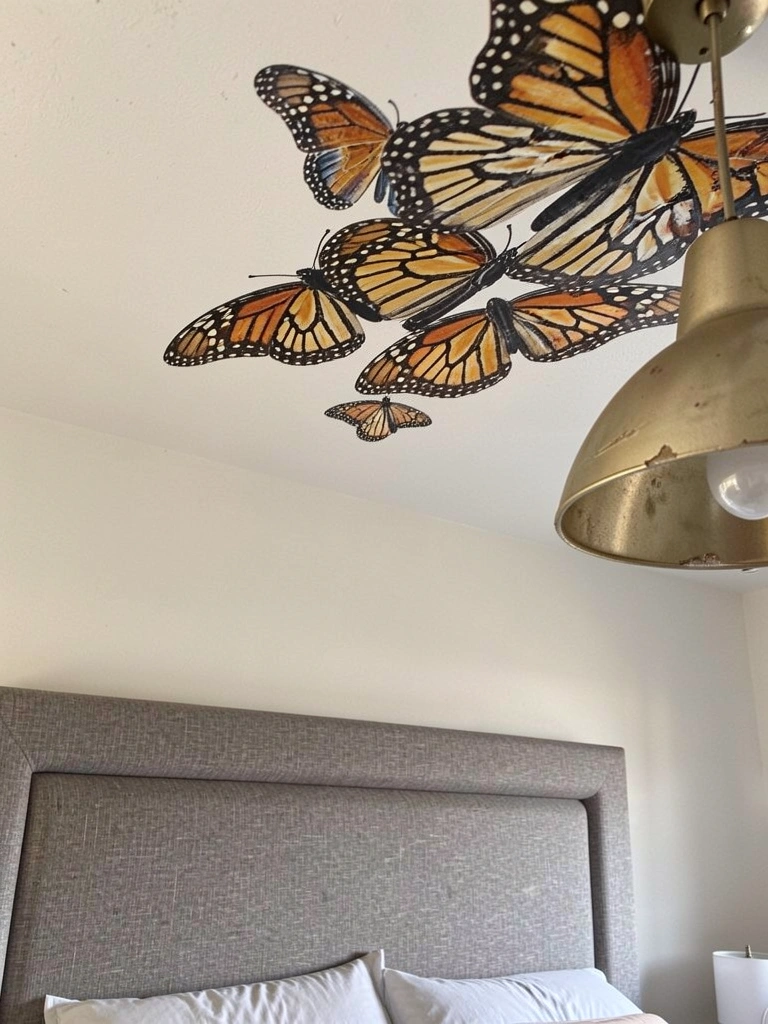
I start by choosing where the eye should land. Over the bed is my go-to. Above the bedside or over the center of the room both work. That decision sets how dense the butterfly group will be.
Visually, a clear focal area stops the ceiling from feeling like random decoration. People often miss how the ceiling should relate to furniture below. Avoid centering everything by eyeballing symmetry; that often looks staged. A slight off-center cluster feels lived-in and calm.
Step 2: Create depth with varied sizes and spacing
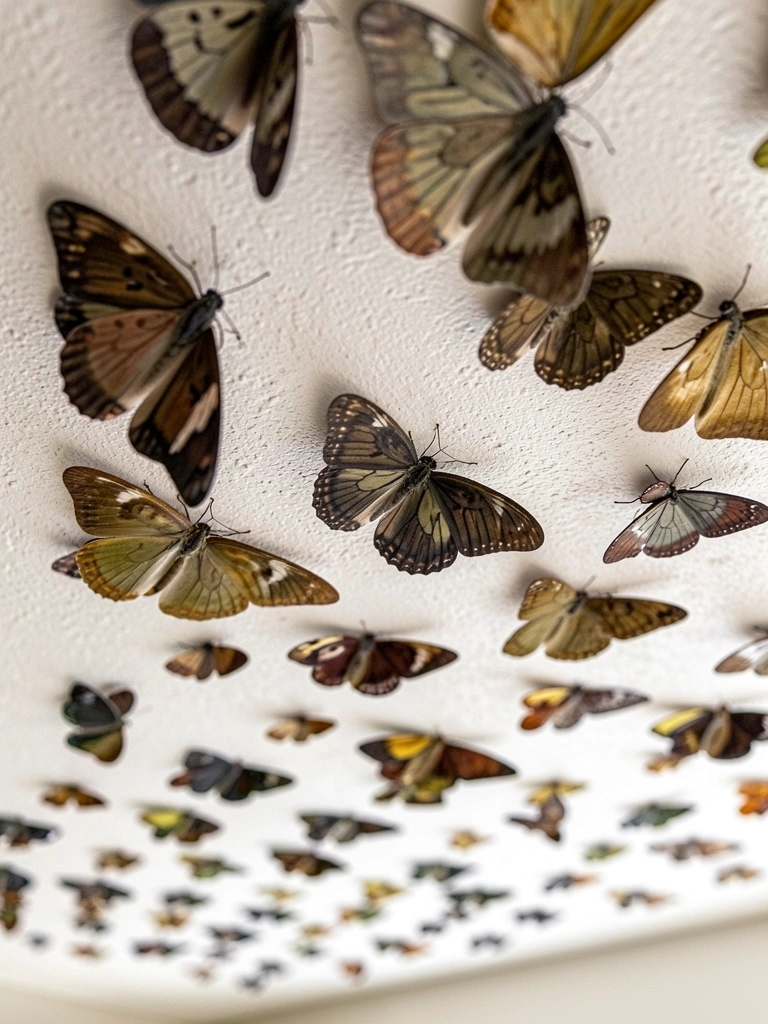
I arrange butterflies in planes, not a flat layer. I mix large pieces near the focal point and scatter smaller ones outward. I tilt a few wings slightly up to catch light. That creates movement and real depth.
The ceiling should look like a gentle breeze frozen in place. Most people place everything flat and the effect disappears. The small mistake is clustering identical sizes; it reads as wallpaper. Vary size and spacing so the eye can travel.
Step 3: Layer in lights and garland for subtle movement
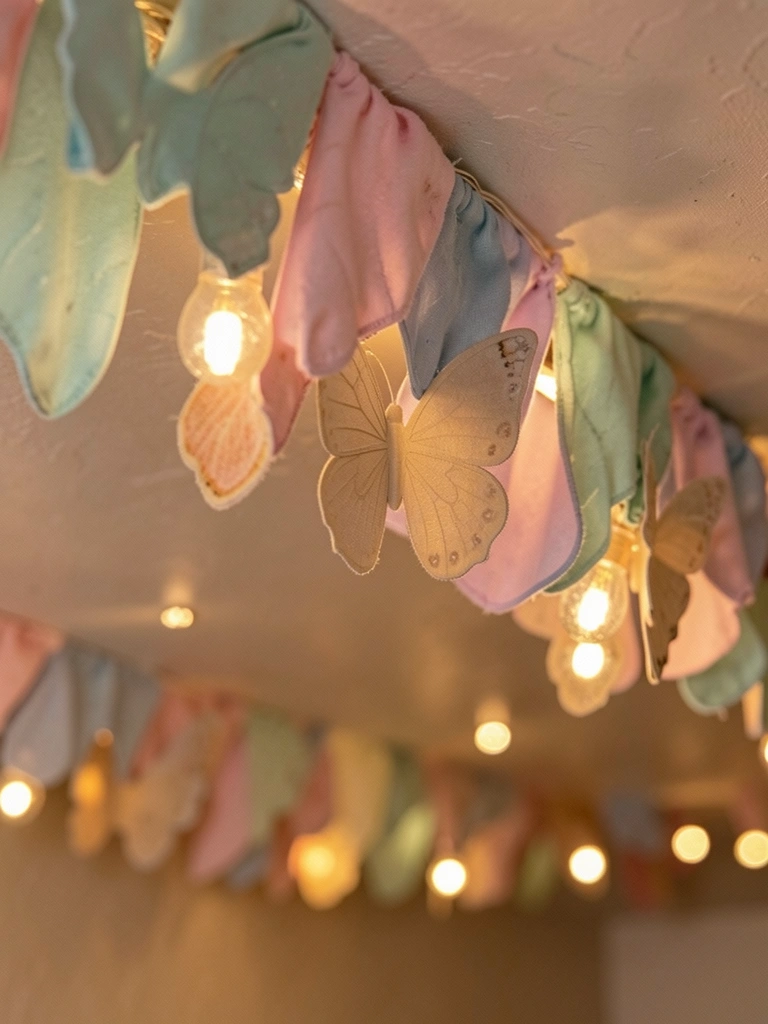
I tuck warm fairy lights behind the larger butterflies and drape the fabric garland so it suggests motion. The lights add a soft halo and the garland brings a textile feel that reads from below. I keep the glow low.
A detail many miss: backlighting makes flat paper appear to float. The common mistake is using bright bulbs or exposed batteries. Hide the battery pack near a curtain or planter, and choose warm, dimmable string lights for a comfortable glow.
Step 4: Anchor the ceiling with room-level pieces
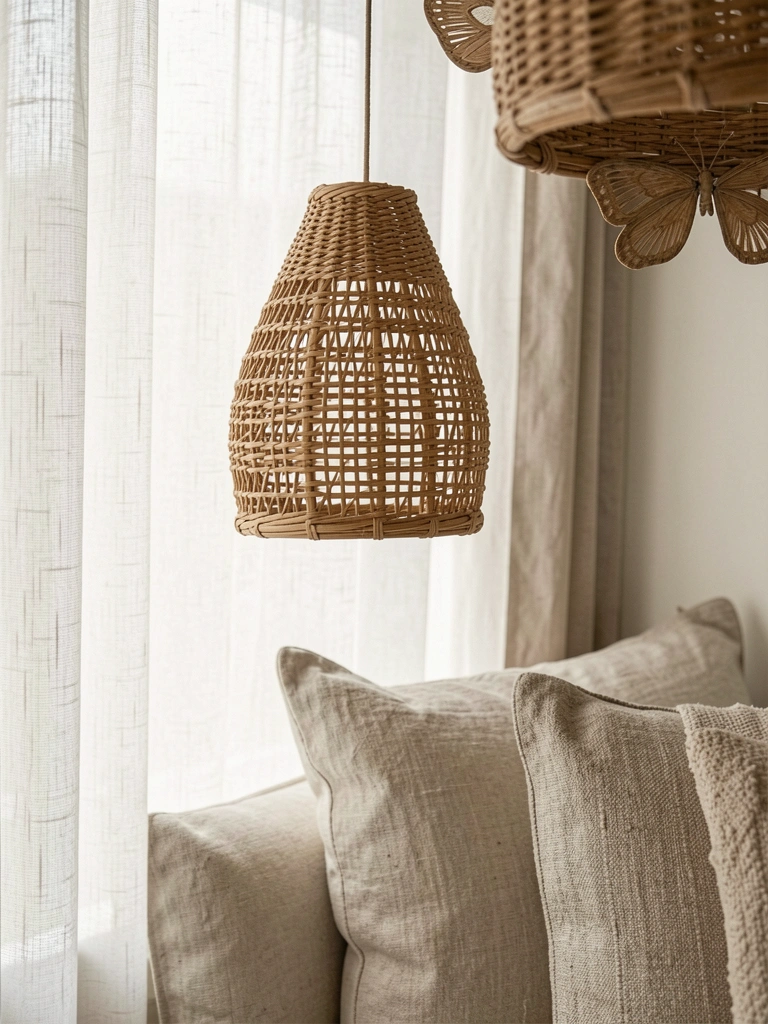
I bring colors and materials down to the floor. Sheer curtains, linen pillows, a rattan pendant, and a hanging planter create a thread that connects the ceiling to the room. Echoing tones makes the butterflies feel like they belong.
People underestimate scale. Tiny pillows won’t read from the bed the same way ceiling pieces do. The mistake is mismatched scale or clashing textures. Keep one or two materials consistent—linen or rattan—and repeat them in more than one place.
Step 5: Sit, scan, and edit until it feels right
I always sit on the bed and stand in the doorway before calling it done. From those angles you see what others will see. I move a butterfly, soften a line of lights, or remove a piece until the flow feels calm.
An insight I rely on: less is usually better. The common mistake is over-correcting—adding more to fix a small imbalance. Edit ruthlessly. If one section reads heavy, pull a few pieces back rather than adding more.
Placement Tips for Different Rooms
Bedrooms favor clusters above the bed or slightly toward the footboard. Keep the group close enough to read from bed but not so dense it feels like a canopy. In smaller rooms, a single diagonal sweep can add motion without crowding.
Living rooms work with a looser scatter across the central ceiling or a single pathway from light to window. Kids’ rooms can take brighter colors and playfulness. Always consider sightlines from main seating and the doorway.
Choosing Butterfly Styles and Materials
Paper and fabric read soft and handmade. Matte finishes avoid glare and feel calmer. If you want texture, pick a linen or felt option; for crisp silhouettes, use matte cardstock cutouts.
Consider weight. Heavier items need secure hooks; lighter pieces hang flatter and flutter slightly with air movement. Match the material to the room’s textiles so the ceiling feels connected, not tacked on.
Lighting and Mood
Soft, warm light keeps the ceiling gentle. Use fairy lights on a dimmer if possible, or battery-operated strings hidden behind butterflies. Avoid cool or harsh bulbs; they flatten the effect.
Bulb placement matters. A halo behind a large butterfly reads like floating. Keep visible cords neat and tuck power sources where a curtain or planter can hide them. Small adjustments change the whole mood.
Final Thoughts
Start small. Add a cluster, live with it for a week, then adjust.
Trust what you see from the bed and doorway. Those views matter most.
Be willing to edit. A simpler ceiling will feel more deliberate.
You can do this in stages and still get a calm, balanced result.