I used to assume party decor had to be perfect. It doesn’t.
I learned small, homemade touches feel the most alive.
These ideas are tested in real rooms, with kids, glitter, and returns.
11 Fun Butterfly Room Decor Birthday Ideas For A Magical Party
These 11 ideas are practical and easy to recreate in a real home.
I’ll walk you through looks I’ve used, what went wrong, and what to buy.
You’ll get 11 concrete setups you can finish in an afternoon.
1. Color-graded Paper Butterfly Garland Across the Ceiling
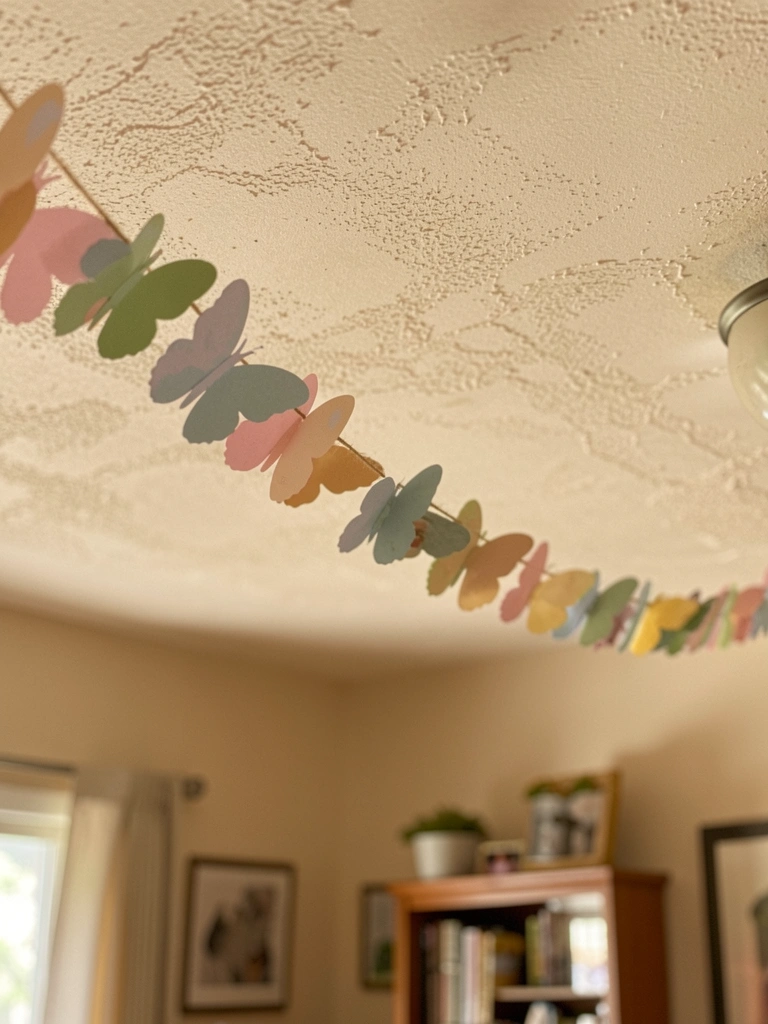
I strung a color-graded paper butterfly garland from one side of my living room to the other for a party. It made the whole room feel intentional without covering furniture. I messed up spacing at first—too tight—and it read cluttered. Spreading the strands and keeping a few inches between butterflies fixed it.
Visually, the ceiling detail draws eyes up and makes low rooms feel taller.
Tip: use removable hooks so you don’t scuff paint.
What You’ll Need for This Look
- 10ft pastel paper butterfly garland https://www.amazon.com/s?k=paper+butterfly+garland+10ft&tag={{amazon_tag}}
- Small adhesive ceiling hooks (clear) https://www.amazon.com/s?k=clear+adhesive+ceiling+hooks&tag={{amazon_tag}}
- Twine or thin fishing line, clear https://www.amazon.com/s?k=clear+fishing+line+spool&tag={{amazon_tag}}
2. Peel-and-Stick Butterfly Decal Gallery Wall

I used removable butterfly decals to create a gallery wall by the play table. They were lifesavers: no hammering, no drama. I learned to press each decal firmly from the center out to avoid edges peeling—one set bubbled on me at first. Placing larger butterflies near eye level and smaller ones trailing upward kept the look intentional, not random.
It’s a low-commitment way to change the room’s vibe for a birthday and then revert.
What You’ll Need for This Look
- Removable butterfly wall decals (assorted sizes) https://www.amazon.com/s?k=removable+butterfly+wall+decals&tag={{amazon_tag}}
- Smoothing tool or credit card for application https://www.amazon.com/s?k=plastic+squeegee+tool&tag={{amazon_tag}}
- Painter’s tape for layout planning https://www.amazon.com/s?k=painter%27s+tape&tag={{amazon_tag}}
3. Sheer Butterfly Canopy with Warm String Lights
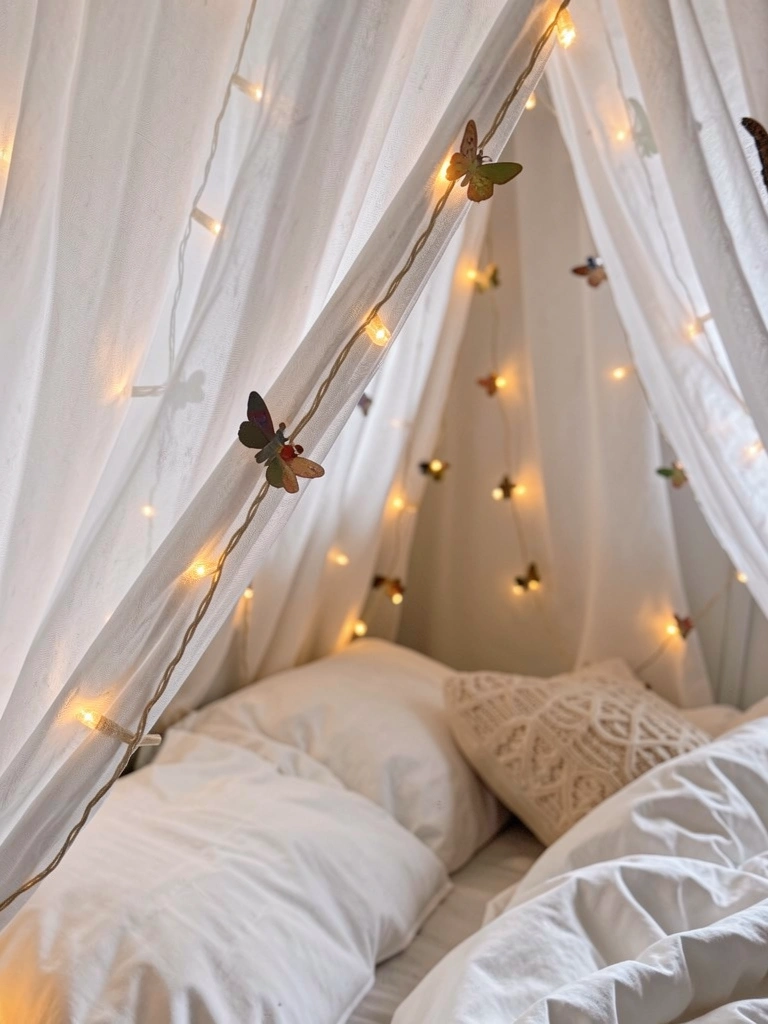
I draped a sheer canopy over a corner reading nook and clipped tiny paper butterflies along the rim. The string lights inside created a soft glow that kept the space cozy even after sunset. My early attempt used lights that were too bright—switching to warm, dimmable LEDs solved it. The canopy made the party area feel private, like a special little world for the birthday kid.
Keep fabrics light so the canopy breathes and doesn’t feel suffocating.
What You’ll Need for This Look
- Sheer canopy fabric, white (drop size) https://www.amazon.com/s?k=sheer+canopy+fabric+white&tag={{amazon_tag}}
- Warm white LED string lights (battery) https://www.amazon.com/s?k=warm+white+battery+string+lights&tag={{amazon_tag}}
- Mini butterfly clips (paper) https://www.amazon.com/s?k=mini+butterfly+paper+clips&tag={{amazon_tag}}
4. Butterfly Balloon Clusters with Paper Wings
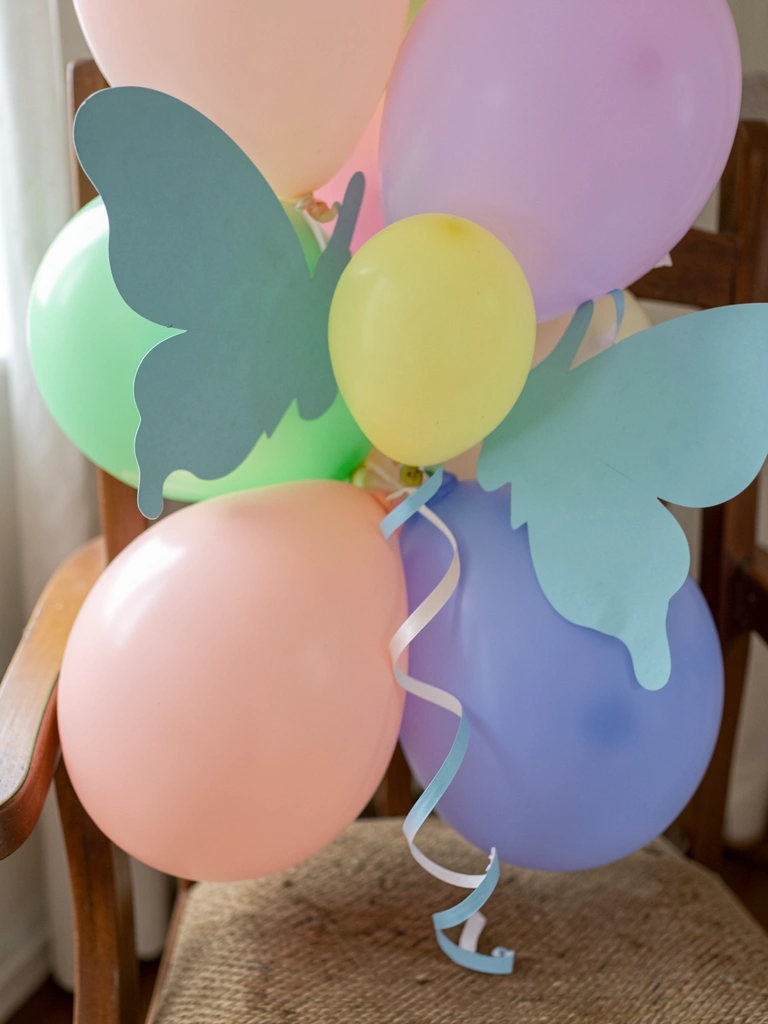
I made balloon clusters and added paper butterfly wings and curled ribbon to make them feel themed without buying special balloons. The first batch got saggy by afternoon; swapping to high-quality latex and using a small helium tank kept them buoyant. Clustering three balloons per wing made the butterflies read as little creatures instead of random balloons.
Arrange clusters near focal points like the cake table and entry.
What You’ll Need for This Look
- Pastel latex balloons (assorted sizes) https://www.amazon.com/s?k=pastel+latex+balloons&tag={{amazon_tag}}
- Paper butterfly wing cutouts (assorted colors) https://www.amazon.com/s?k=paper+butterfly+cutouts&tag={{amazon_tag}}
- Small helium tank for home use https://www.amazon.com/s?k=small+helium+tank&tag={{amazon_tag}}
5. Tissue Pom Backdrop with Floating Butterflies
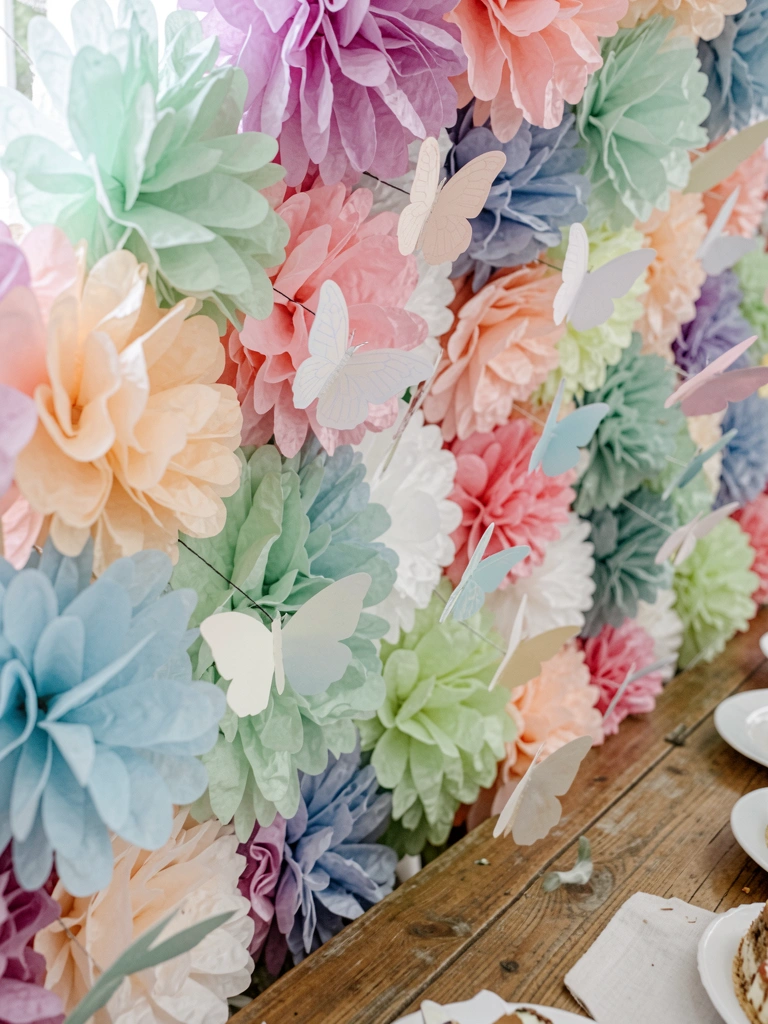
I built a dessert table backdrop from tissue pom-poms and tucked lightweight paper butterflies into the creases. It made the cake photos feel soft and lively. I learned that smaller pom-poms close together read better on camera than larger, floppy ones. Adding butterflies in clusters gives depth, like they’re resting on the flowers.
This backdrop also doubles as a gift-wrapping station background after the party.
What You’ll Need for This Look
- Tissue paper pom-poms (assorted pastels) https://www.amazon.com/s?k=tissue+paper+pom+poms+assorted&tag={{amazon_tag}}
- Small paper butterfly accents https://www.amazon.com/s?k=small+paper+butterfly+accents&tag={{amazon_tag}}
- Command hooks for hanging backdrop https://www.amazon.com/s?k=command+hooks+clear&tag={{amazon_tag}}
6. Window Shadow Mobile That Moves with Breeze
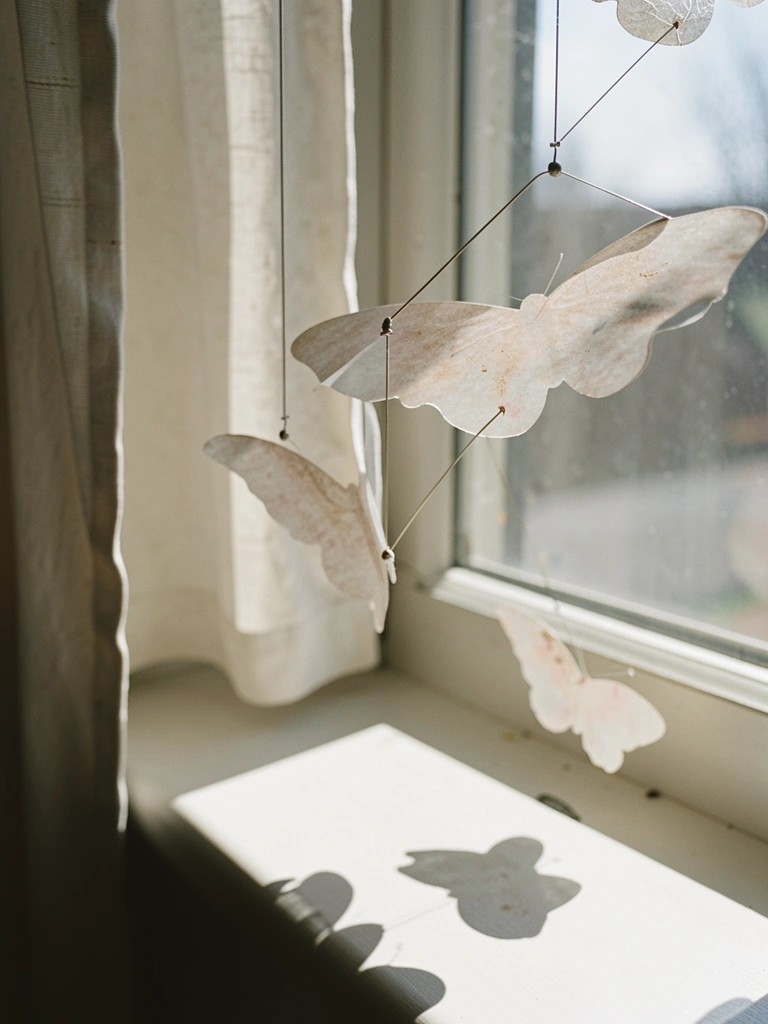
I hung a lightweight butterfly mobile by a sunniest window and loved the soft shadows it cast across the floor. It became one of my favorite accidental photo moments from the party. I did have one version too heavy for the swivel and it stopped moving—switching to vellum paper fixed that. The movement makes a room feel alive without extra lights or fuss.
Hang it where a gentle breeze can reach it, not where it will brush lamps or curtains.
What You’ll Need for This Look
- Butterfly mobile kit, translucent vellum https://www.amazon.com/s?k=butterfly+mobile+vellum&tag={{amazon_tag}}
- Thin jewelry wire for hanging https://www.amazon.com/s?k=thin+jewelry+wire&tag={{amazon_tag}}
- Small ceiling hook with swivel https://www.amazon.com/s?k=ceiling+hook+swivel&tag={{amazon_tag}}
7. Mixed Butterfly Throw Pillows for Lounge Areas
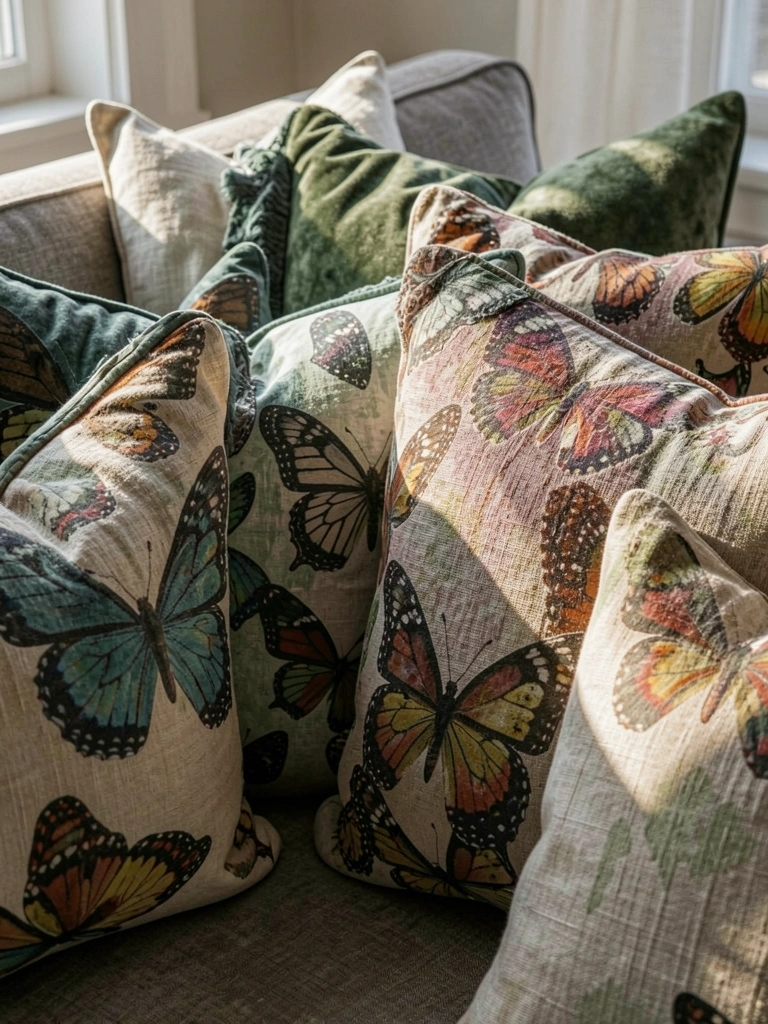
I swapped my usual throw pillows for a mix of butterfly prints and plain textured covers for the party seating area. It instantly read celebratory but still cozy. At first I picked too many prints and the sofa looked busy—adding solid colors grounded everything. The variety of textures (linen, velvet) made the seating invitation feel real, not staged.
Pillows are easy to change back after the party, so they’re a low-risk way to commit to a theme.
What You’ll Need for This Look
- Butterfly print lumbar pillow cover (12×20) https://www.amazon.com/s?k=butterfly+print+lumbar+pillow+cover+12×20&tag={{amazon_tag}}
- Solid linen square pillow covers (18×18) https://www.amazon.com/s?k=linen+pillow+cover+18×18&tag={{amazon_tag}}
- Velvet throw cushion (soft pink) https://www.amazon.com/s?k=velvet+throw+pillow+soft+pink&tag={{amazon_tag}}
8. Butterfly Table Runner and Natural Place Settings
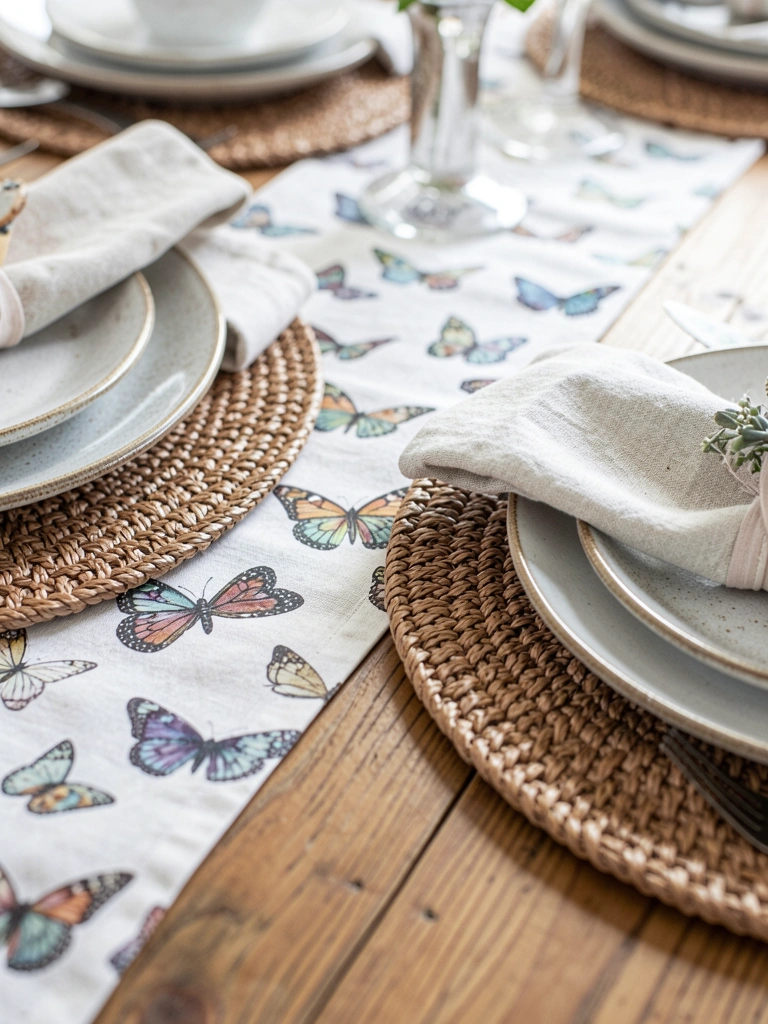
I used a butterfly-patterned table runner with woven placemats and linen napkins for the kids’ table. It looked pulled together without feeling too precious. Early on, I tried a glitter runner that shed everywhere—never again. Natural materials make cleanup easier and the table feel grounded. A small paper butterfly tucked into each napkin felt like a thoughtful detail kids noticed.
Keep breakable decor off the edge when kids are at the table.
What You’ll Need for This Look
- Butterfly-pattern table runner (cotton) https://www.amazon.com/s?k=butterfly+table+runner+cotton&tag={{amazon_tag}}
- Woven round placemats (natural) https://www.amazon.com/s?k=woven+round+placemats&tag={{amazon_tag}}
- Linen napkins, soft beige https://www.amazon.com/s?k=linen+napkins+beige&tag={{amazon_tag}}
9. Craft-and-Favor Station with Paintable Wooden Butterflies
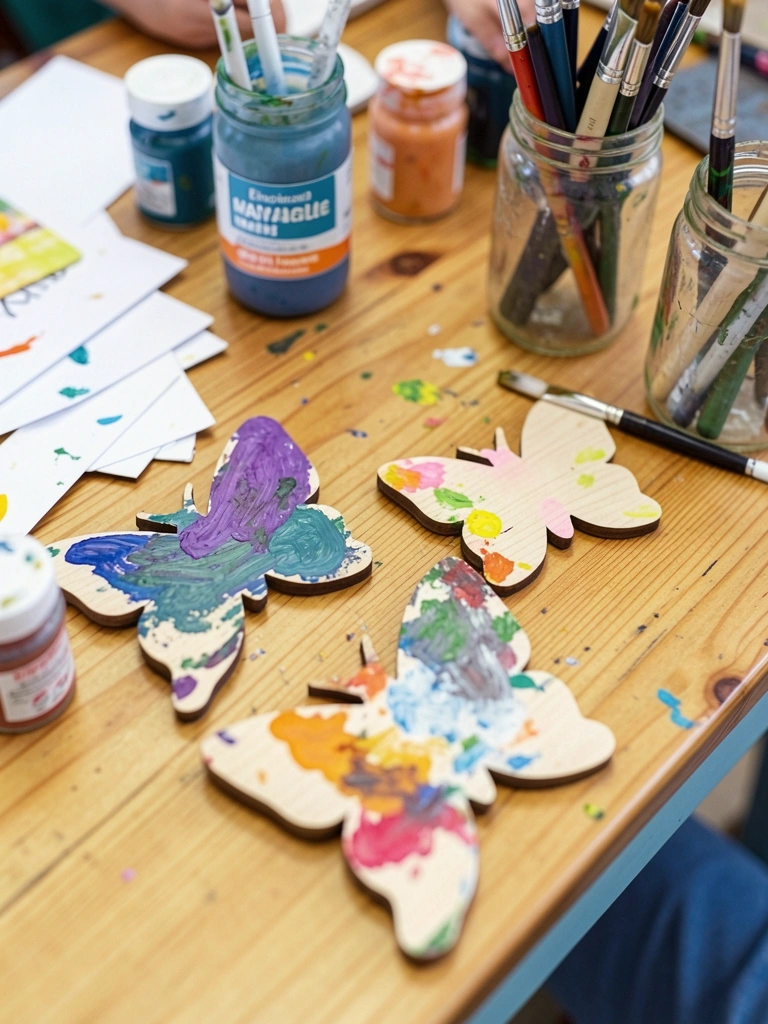
I set up a craft table where kids painted wooden butterfly cutouts that doubled as favors. It kept them busy and the finished pieces became part of the decor. I misjudged the paint type at first—glossy paints smeared—so I switched to washable tempera and it was a relief. Stationing a wet-scrap box and aprons made cleanup manageable and let parents relax.
Make the crafts gift-ready with a small bag and label station.
What You’ll Need for This Look
- Paintable wooden butterfly cutouts (pack of 24) https://www.amazon.com/s?k=paintable+wooden+butterfly+cutouts&tag={{amazon_tag}}
- Washable tempera paint set https://www.amazon.com/s?k=washable+tempera+paint+set&tag={{amazon_tag}}
- Kids’ art aprons (waterproof) https://www.amazon.com/s?k=kids+art+aprons+waterproof&tag={{amazon_tag}}
10. Pressed-Style Butterfly Prints Framed on a Shelf
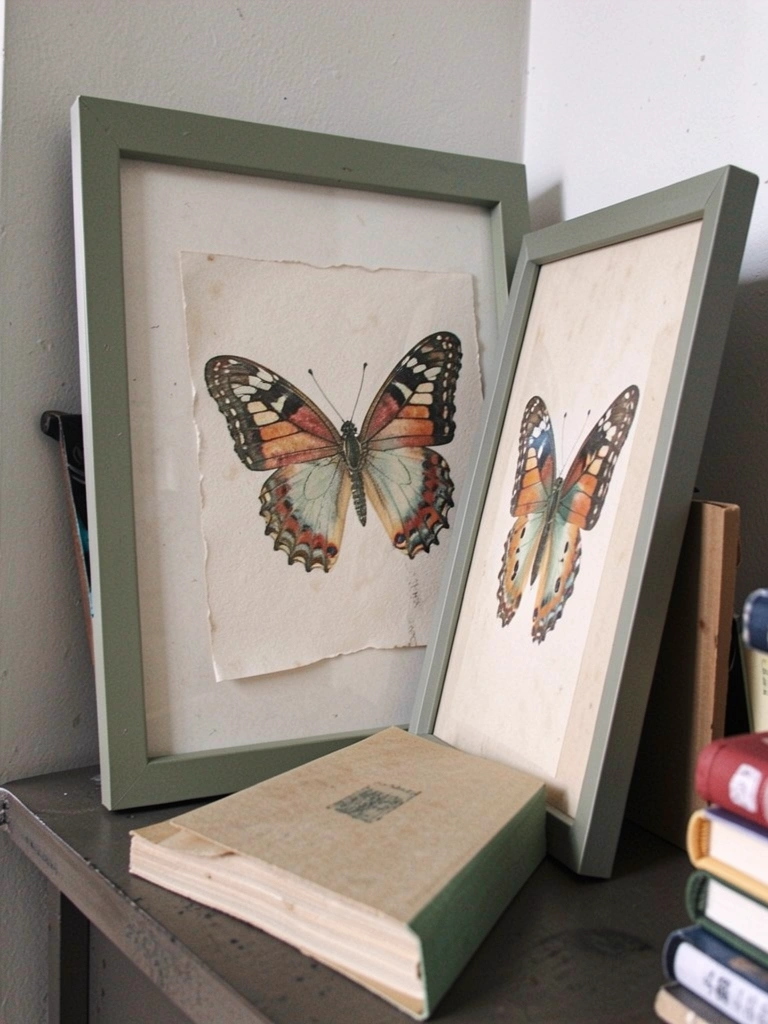
I framed pressed-style butterfly prints and leaned them on shelves and mantels. They felt grown-up and matched the playful elements elsewhere so the room didn’t feel infantilized. At first I used glossy frames and the prints looked cheap—matte frames read more intentional. These small frames became keepsakes after the party and I still like seeing them on rotation.
Cluster two or three frames together for more presence without a full gallery.
What You’ll Need for This Look
- 5×7 matte black frames (set of 3) https://www.amazon.com/s?k=5×7+matte+black+frames&tag={{amazon_tag}}
- Botanical-style butterfly art prints (5×7) https://www.amazon.com/s?k=butterfly+art+prints+5×7&tag={{amazon_tag}}
- Foam board for backing if needed https://www.amazon.com/s?k=foam+board+sheet&tag={{amazon_tag}}
11. Photo Wall with Mini Clothespins and Pop-Up Butterflies

I made a photo wall with string, mini clothespins, and pop-up paper butterflies between snapshots. Guests loved finding their photos. I learned to use printed 4×6 photos rather than phone prints—the scale reads better across the wall. The butterflies threaded through the string added dimension and made the display feel celebratory without being over the top.
This also doubles as a timeline activity where you can add new photos during the party.
What You’ll Need for This Look
- Mini wooden clothespins (pack) https://www.amazon.com/s?k=mini+wooden+clothespins&tag={{amazon_tag}}
- Natural twine photo hanging kit https://www.amazon.com/s?k=photo+hanging+twine+kit&tag={{amazon_tag}}
- Pop-up paper butterflies (3D) https://www.amazon.com/s?k=pop+up+paper+butterflies&tag={{amazon_tag}}
Final Thoughts
You don’t need to do every idea. Pick two or three that suit your space and energy.
I keep things low-fuss and replaceable. Little mistakes taught me what’s worth the effort.
Go for looks that feel like home, not a set.